
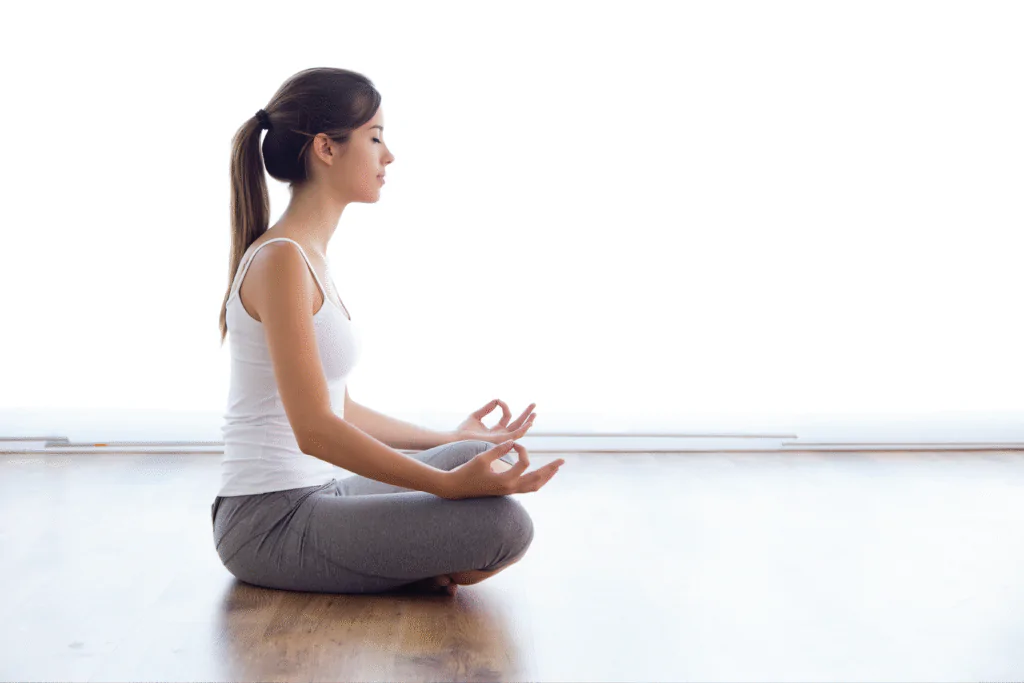
Have you ever wondered how to make your meditation sessions more comfortable and effective? The answer often lies in finding the best meditation position for your body and mind. Different meditation poses provide unique benefits from deepening focus to improving posture and energy flow. However, there is literally no 1 best meditation to work for everyone, it varies from person to person, someone would have back-pain that he can’t sit comfortable, or you fall asleep while meditating. In this article, we are going to over most common yet effective Meditation, let’s start the journey at the end of the article, you will get couple posture to test out.
In this guide, we’ll explore the most famous meditation positions, their benefits, and how to choose the right pose for meditation. Whether you’re a beginner or an experienced practitioner, you’ll discover the ideal guided meditation position to match your needs.
Table of Contents
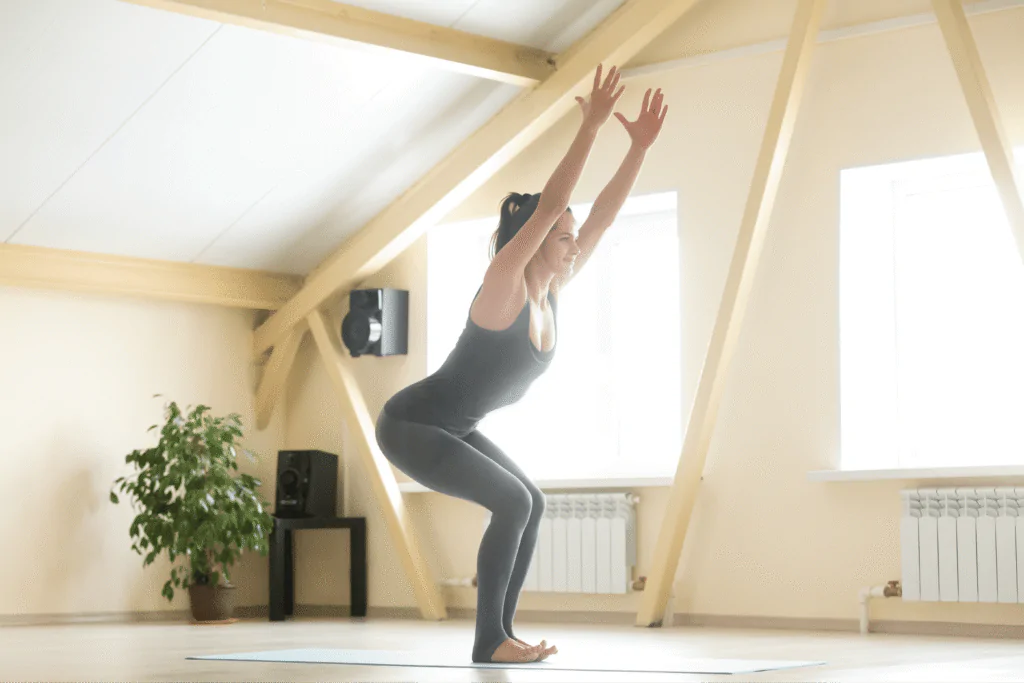
1. Chair Pose (Utkatasana)
Utkatasana is the best meditation position if you are a physically strength-focused person, as it strengthens your arms, back, ankles and leg muscles with a simple meditation position. In this meditation position, you need to pose like you are sitting on the imaginary Yogi Chair.
Benefits of Chair Pose
- Great for beginners or those with knee/hip issues.
- Keeps the spine supported and aligned.
- Ideal for office or quick meditation breaks.
How to do Chair Pose?
- Inhale the breath. And raise your arms so that they align with your eyes.
- Exhale the breath, and bend your legs till your thighs align with the floor, and your knees point out forward.
- Make sure that both of your tights are aligned with each other.
- Stay in this position, inhaling and exhaling from 20 seconds to 1 minute.
So, do you think that you active and strong enough to bend your body while facing upword? If yes, then you can tryout, but if not then don’t push yourself, Take it easy. Maybe you have back-pain or your legs aren’t much strong to hold your body, don’t worry. we got alot more Meditation Postures.
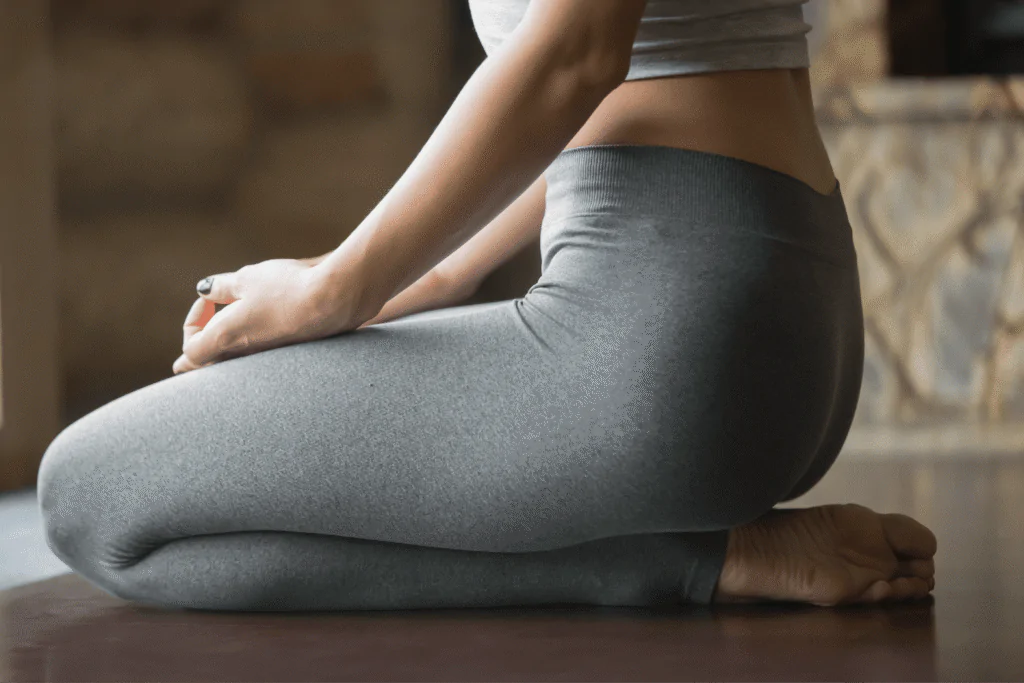
2. Half Lotus (Ardha Padmasana)
Half Lotus is a Meditation position where one leg is folded with the foot on the opposite thigh, and the other leg is folded underneath, with the foot resting near the opposite groin.
This Position serves as the starting point for Lotus Pose. If you are a beginner in meditation, you need to start with a half Lotus to make your legs comfortable and train for the full lotus position. Besides, Half Lotus contain medium-length meditation sessions, so this meditation position will not get you bored as a beginner. However, If you can’t sit on floor, maybe your knees hurt while sitting in the half lotus posture. You can try in bed, meditation crucial Step is to make yourself comfortable.
Half Lotus benefits
- Balances comfort and stability.
- stretches the hips, knees, ankles, and thighs
- Opens hips and strengthens back muscles.
- Suitable for medium-length sessions.
How to do the Half Lotus ?
- Sit on the Floor, keep your legs open and on the floor.
- Now, take your left leg up to hug your chest.
- slide under your right leg, till the right leg is up.
- Then bend your left leg on the right leg’s ankle.
- Now inhale and exhale through the nose.
- Want to learn more about half Lotus pose ?
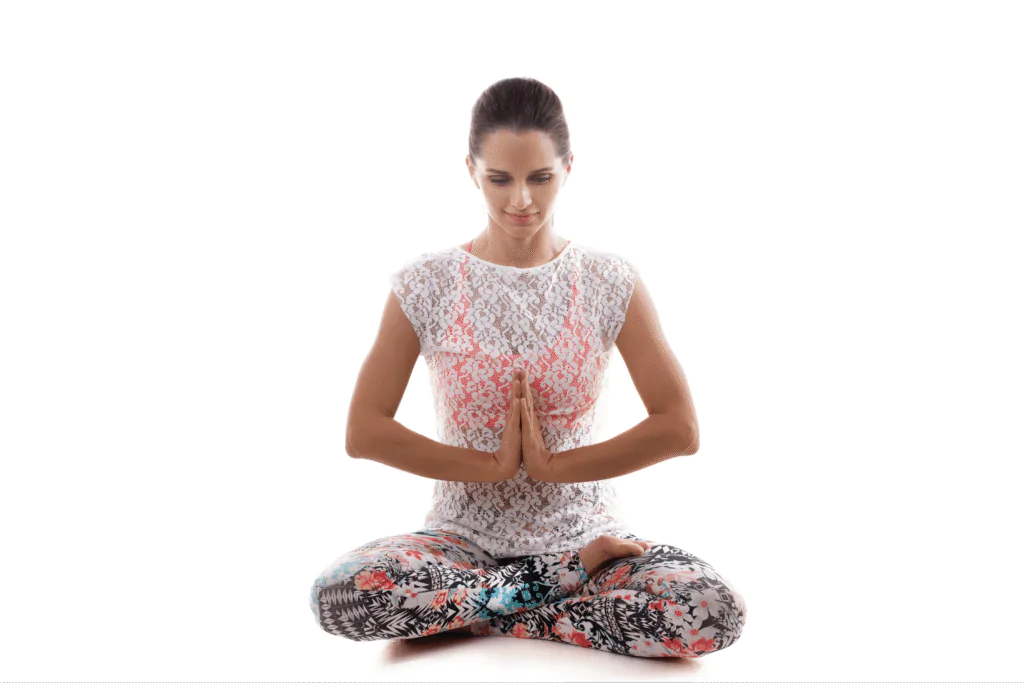
3. Full Lotus (Padmasana)
Once you are satisfied with the half Lotus meditation pose, and you are comfortable with the half Lotus meditation position. And now you are you stepping 1-step further? Then the Full Lotus meditation position has your back; it advances your Meditation Journey.
Wondering what the 1 extra Step is? It is just to bend your right leg to put your left leg upon it without moving your left leg from the Half Lotus.
Benefits of Full Lotus
- Deepens meditation by locking body posture.
- Aligns spine naturally.
- Improves hip flexibility and mental stability.
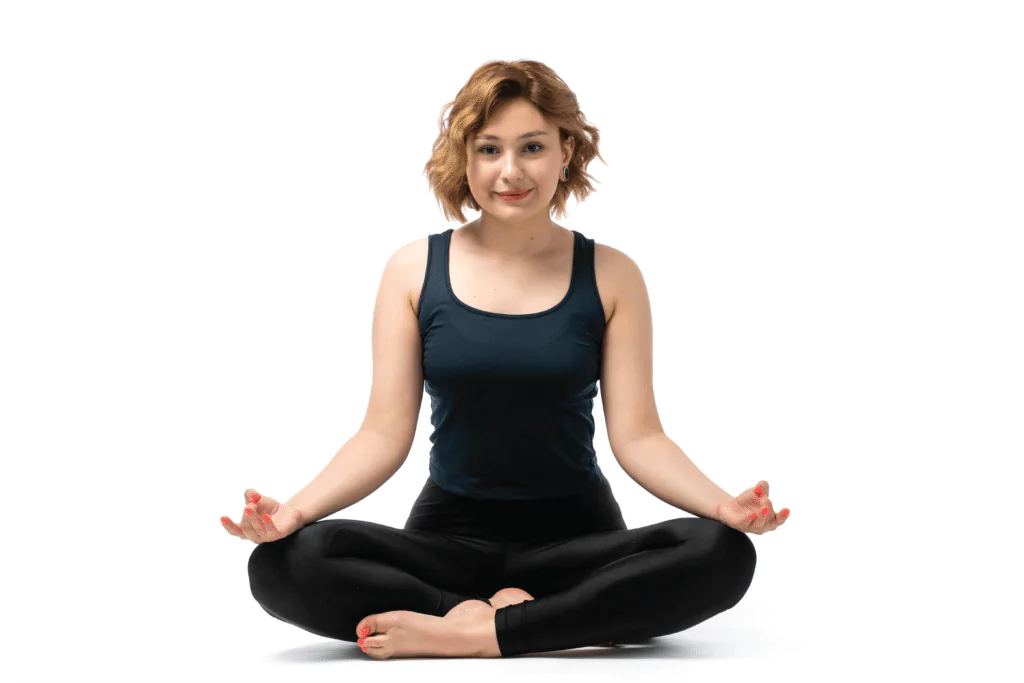
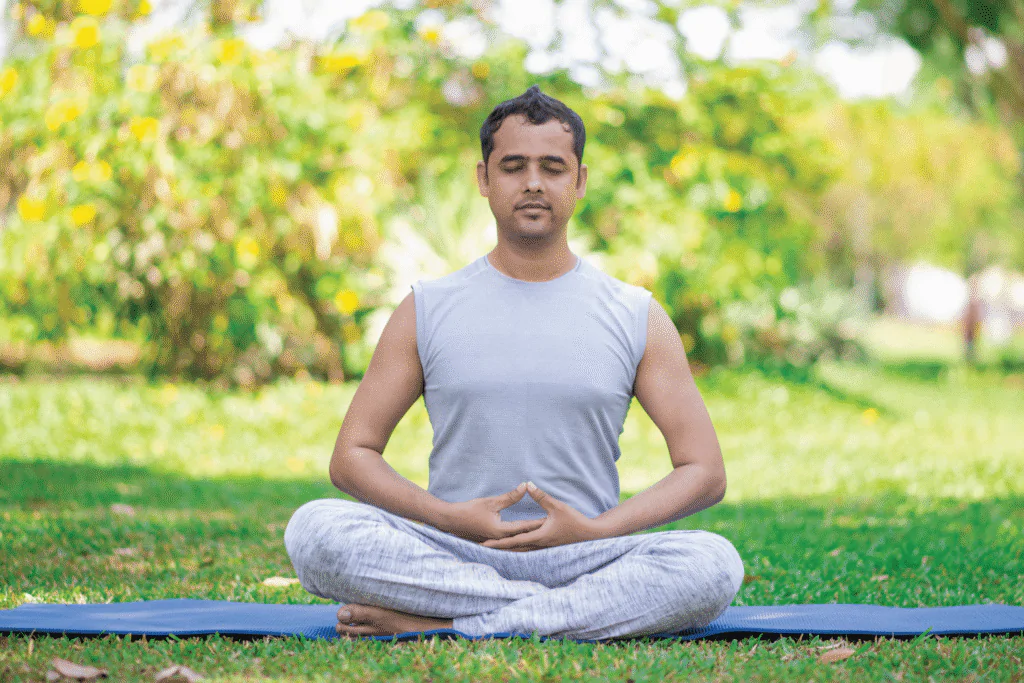
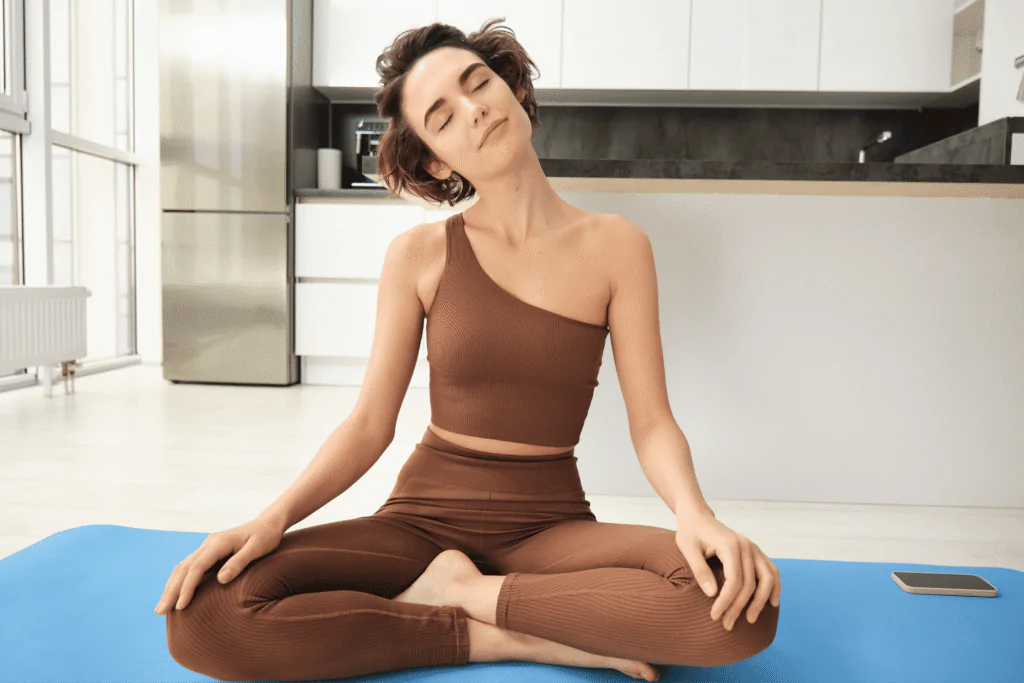
4. Sukhasana (Easy Pose)
If you feel that Half and Full Lotus positions aren’t a Piece of cake, then you should try Sukhasana (Easy Pose). It doesn’t require crossing your legs over each other, but you need to cross underneath each other, which is more comfortable and easier.
Benefits of Sukhasana:
- The easiest seated position for beginners.
- Encourages steady breathing and relaxation.
- Improves lower back flexibility.
How to do Sukhasana meditation?
- Sit with legs extended in front of you, feet flexed.
- Bend the legs: Fold your legs, bringing your shins to cross in front of each other, with the ankles resting beneath the opposite knees.
- Find your foundation: Ensure your sit bones are firmly grounded and your spine is lengthened upwards
- Keep your eather on your high, or in your lap.
- Focus on the inhale and exhale of breathing.
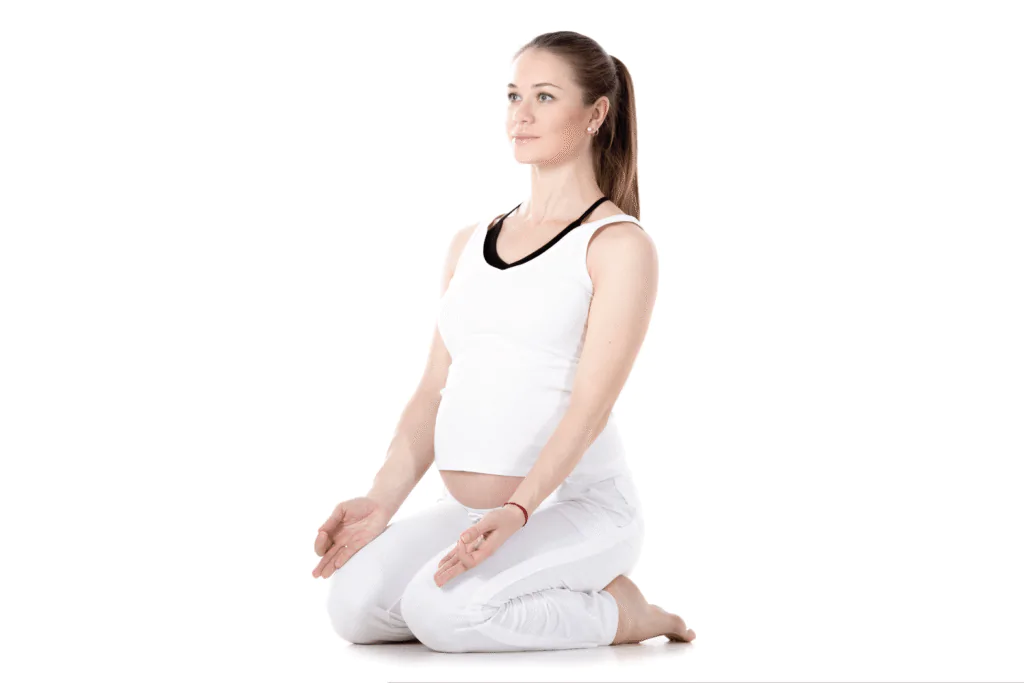
5. Vajrasana (Thunderbolt Pose)
Vajrasana is also known as Thunderbolt or Diamond shape Yoga pose that improves your digestive system with even short meditation sessions. It is perfect for you if you are looking for a posture after a meal as a beginner, then Vajrasana is your friend.
Benefits of Vajrasana
- Enhances digestion when done after meals.
- Great for short guided meditation positions.
- improve attention,
- reduce anxiety,
- improve flexibility
How to do the Vajrasana pose?
- Sit straight on your knees.
- Your feet should be touching the Ground.
- Your buttocks should rest between your legs
- Adjust your feet and legs until you are comfortable. The Back should be straight.
- Rest your hands on your thighs
6. Standing Meditation (Zhan Zhuang)
The standing meditation position is designed for beginners and experienced practitioners, which helps you to strengthen and flow the energy to your whole body. A simple standing position for a few minutes can boost your energy for the day. If you are energetic enough to do any less physical exercise, then you should try at least one time of standing meditation.
Benefits of Standing Meditation:
- Builds grounding energy and balance.
- Increases stamina and focus.
- Ideal for mindfulness in nature.
How to do Standing Meditation?
- Stand straight for 1 minute to activate your muscles.
- Now, bend your knees a bit, and your buttocks should be straight to the ground.
- Support your body weight a bit by putting your Hands on your thighs.
- If you need extra support, you can perform beside the walk to get back support wherever needed.
- Stand in the same position for 30 Seconds to 1 minute.
7. The Burmese Position
The Burmese meditation position allows you to sit on the floor with open legs, feet resting on the ground. This meditation position is for beginners who have just started with the sitting meditation. It has only one challenge, which is to straighten the spine.
Benefits of the Burmese position
- Comfortable alternative to Lotus.
- Stability: The Burmese position offers a stable base for meditation.
- Reduces pressure on knees.
- Suitable for longer meditation sessions.
How to do the Burmese meditation position?
- Find a comfortable place to sit. You can use the cushion to support your hip to a high height.
- Keep your hip higher, and cross your feet
- Rest your feet on the floor
- Format a diamond with hand fingers to fix your arms.
- Maintain the alignment of your hip, shoulder, and ears.
- If your knees or ankles hurt, then try to place a Blanket or cushion.
8. Chair Meditation (Seated Mountain Pose)
No matter if you are an experienced, mid-level, or beginner meditation practitioner, the Seated Mountain pose is your daily routine. This meditation position is formatted to make the alignment of your body, and is often used as a warm-up meditation before getting ready for longer meditation positions.
Nowadays, almost all of us have breaks in our office, you can utilise the break with productive seated Mountain meditation to get yourself ready for Work.
Benefits of Seated Mountain Meditation:
- Perfect for workplace meditation.
- Improves breathing capacity.
- Prevents slouching.
How to do seated Mountain Meditation on an office chair?
- Sit, straightening your spine
- Bring your Arms in front of you straight.
- Interlock your fingers with your left and right hands.
- Move your hands upward, keeping the palms of your hands in an upward direction.
- Maintain normal breathing
- You can keep your body in this position based on your body strength. Once you feel uncomfortable, take a rest.
- Repeat the process if you want.
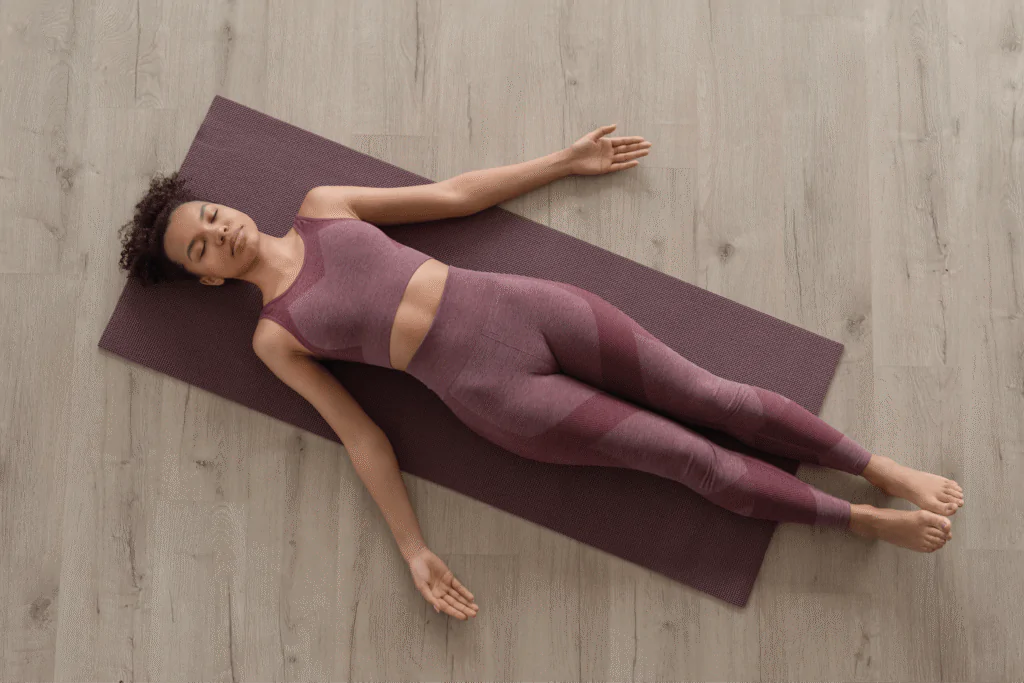
9. Corpse Pose (Savasana)
Corpse Pose meditation is mainly performed at the end of meditation sessions to relax your body and calm your breathing pattern. If your calendar is already filled with things to do, then you can perform the corpse pose. You just simply need to lie down on your bed and relax your body till you fall asleep.
Benefits of Corpse pose:
- Best meditation position for deep relaxation.
- Relieves physical tension.
- Excellent for body scan meditations.
How to do Corpse Pose?
- Lie down on your back, feel your whole body on the bed or floor.
- Open your arms and legs apart from your body.
- Keep your body straight as the centre
- Scan your body, focus on the body part that has tension or pain.
- Focus on your breathing. In the beginning, you can deepen the breaths, but try to bring the breathing to a natural pace.
- Focus on thoughts that keep coming back without judgment.
10. Kneeling Meditation
Kneeling meditation is for those who want to keep their body active but still maintain a calm mind. This position gently engages your legs and back, keeping you alert during the session. If you are the type of person who starts feeling sleepy during meditation, kneeling meditation can keep you fresh and awake.
Benefits of Kneeling Meditation:
- Encourages upright posture without back strain.
- Builds mental alertness.
- A traditional posture in Zen practices.
How to do Kneeling Meditation?
- Place a folded blanket or cushion on the floor to protect your knees.
- Kneel down, keeping your knees hip-width apart.
- Sit back so your hips rest on your heels or the cushion.
- Keep your spine tall and shoulders relaxed.
- Place your hands on your thighs or in your lap.
- Maintain slow, steady breathing for 1–5 minutes, adjusting as per your comfort.
11. Seiza (Japanese Sitting Pose)
Seiza is a traditional Japanese sitting posture often used in tea ceremonies, martial arts, and meditation. It’s perfect if you want a dignified, grounded position without crossing your legs. It also works well for people who find Lotus or Half Lotus challenging.
Benefits of Seiza:
- Keeps spine naturally aligned.
- Reduces hip discomfort compared to cross-legged poses.
- Helps maintain focus for longer periods.
How to do Seiza Meditation?
- Kneel on the floor with your knees together.
- Place a meditation bench or cushion between your calves and thighs for comfort.
- Sit back so your hips rest on the cushion or bench.
- Keep your back straight, chin slightly tucked in.
- Rest your hands on your thighs or in your lap.
- Focus on breathing deeply and evenly.

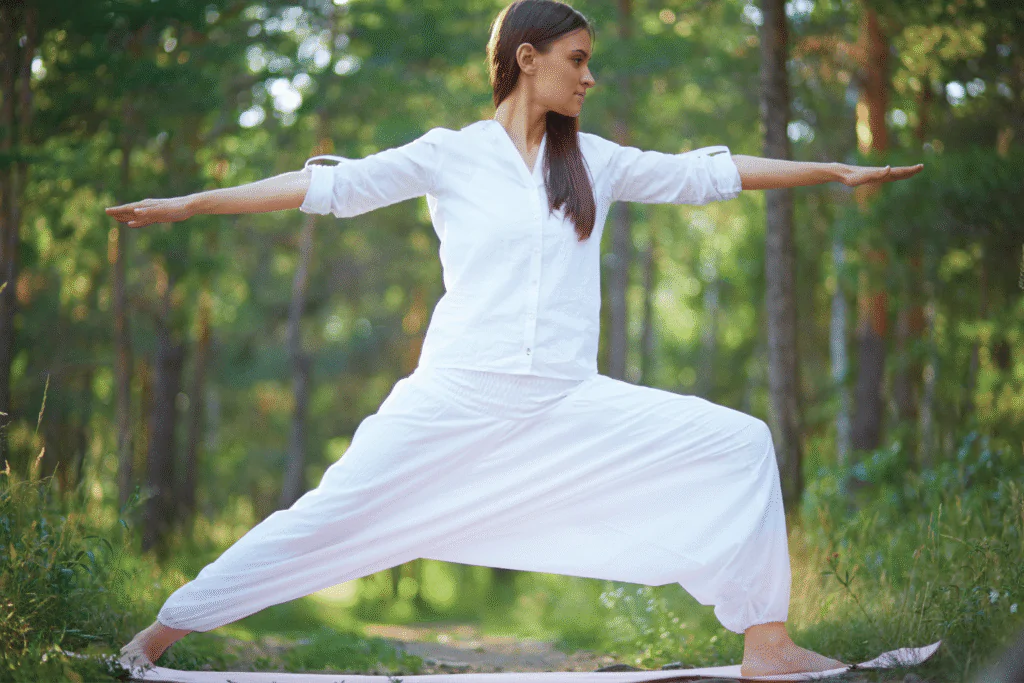
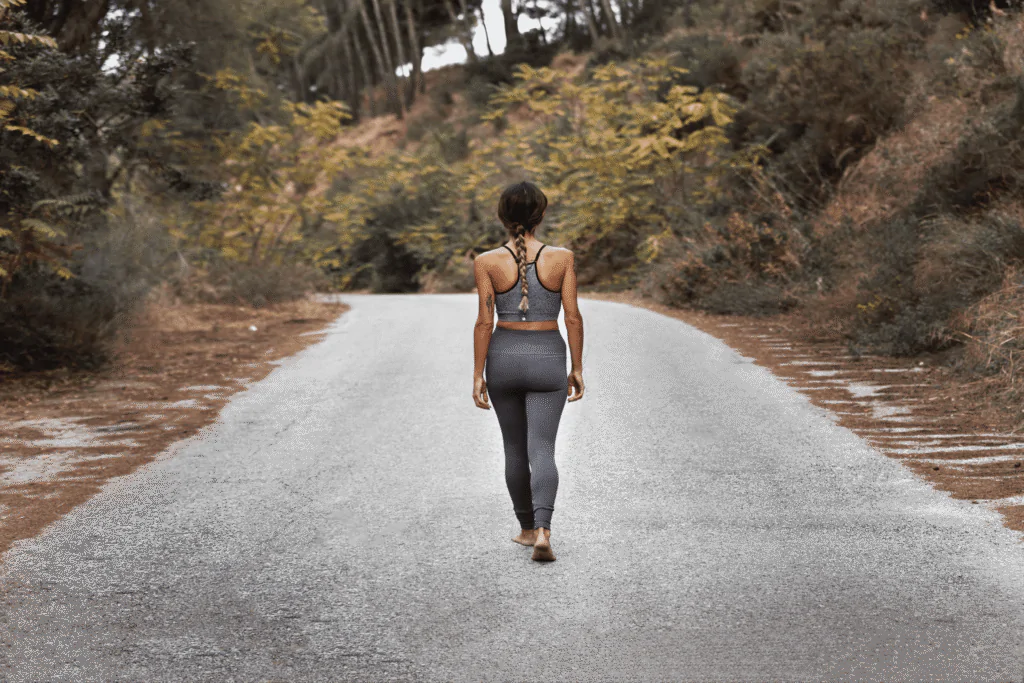
12. Walking Meditation
Walking meditation is the perfect option if sitting still for long makes you restless. It combines mindfulness with gentle movement, helping you connect with your surroundings. It’s also a great practice for breaks during the day or while enjoying nature.
Benefits of Walking Meditation:
- Improves mindfulness in daily activities.
- Enhances balance and body awareness.
- Boosts blood circulation.
How to do Walking Meditation?
- Find a quiet place where you can walk without distractions.
- Stand still for a moment and take a few deep breaths.
- Begin walking slowly, paying attention to each step.
- Feel the sensation of your feet touching and leaving the ground.
- Keep your gaze soft and slightly ahead.
- Continue for 5–10 minutes, maintaining a steady rhythm.
13. Siddhasana (Accomplished Pose)
Siddhasana is considered one of the most important meditation positions in yoga traditions. It aligns the body to channel energy upward, making it ideal for deep meditation and breathing exercises. If you’re working on spiritual development, this pose can be your daily go-to.
Benefits of Siddhasana:
- Promotes energy flow through the spine.
- Strengthens concentration and mental clarity.
- Helps maintain a straight posture for longer sessions.
How to do Siddhasana?
- Sit on the floor with your legs extended.
- Bend your left leg and place your heel close to your groin.
- Bend your right leg and place your heel just above the left ankle, near the pubic bone.
- Keep your knees close to the floor.
- Place your hands on your knees with palms facing upward.
- Keep your back straight and breathe naturally.
14. Hero Pose (Virasana)
Hero Pose is great if you’re looking for a meditative position that stretches your thighs and ankles while keeping you upright. It’s also a good alternative to cross-legged poses for people with tight hips.
Benefits of Hero Pose:
- Stretches thighs, knees, and ankles.
- Improves posture.
- Relieves fatigue in the legs after standing or walking.
How to do the Hero Pose?
- Kneel on the floor with your knees together.
- Move your feet apart so they are slightly wider than your hips.
- Sit between your feet, keeping your toes pointing backwards.
- Use a cushion under your hips if needed for comfort.
- Keep your spine tall and shoulders relaxed.
- Rest your hands on your thighs and breathe deeply.
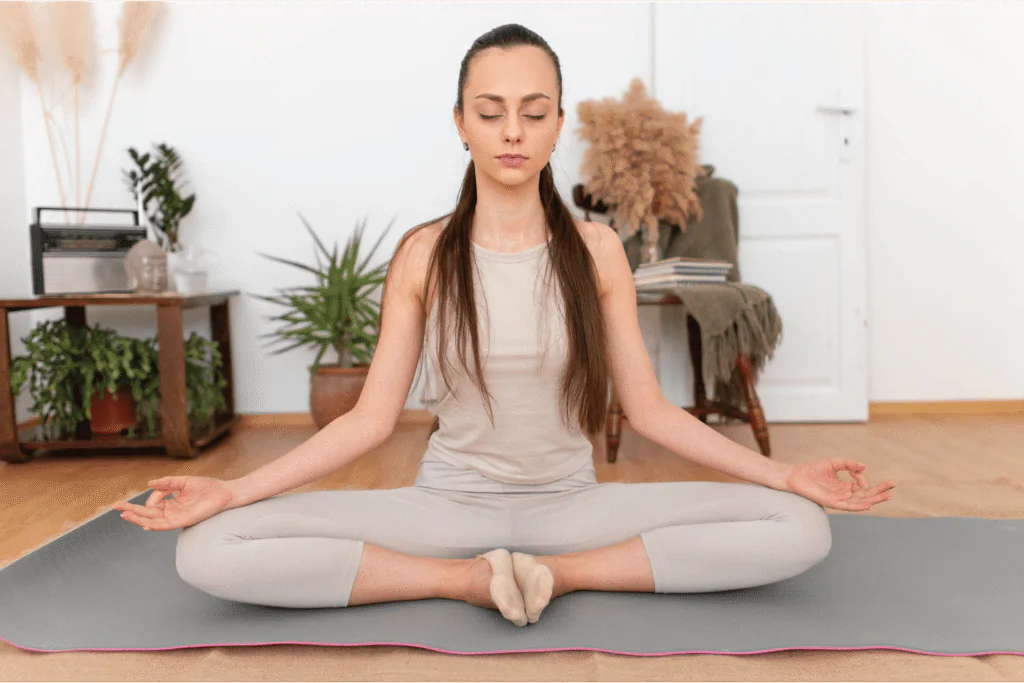
15. Baddha Konasana (Bound Angle Pose)
Baddha Konasana, also called the Butterfly Pose, is a gentle yet powerful position for meditation. It’s perfect if you want to open your hips, improve flexibility, and maintain a relaxed posture for extended sessions. Unlike cross-legged poses, your legs form a diamond shape, which reduces strain on the knees and ankles.
Benefits of Baddha Konasana:
- Opens hips and stretches the inner thighs.
- Promotes better blood circulation in the pelvic area.
- Supports a straight spine without forcing it.
- Great for people with tight hips or lower back stiffness.
How to do Baddha Konasana?
- Sit on the floor with your spine straight.
- Bend your knees and bring the soles of your feet together.
- Pull your feet closer to your groin for a deeper stretch (but don’t force it).
- Let your knees gently drop toward the floor — don’t push them down.
- Rest your hands on your feet or in your lap.
- Close your eyes, breathe deeply, and hold the position for 1–5 minutes.
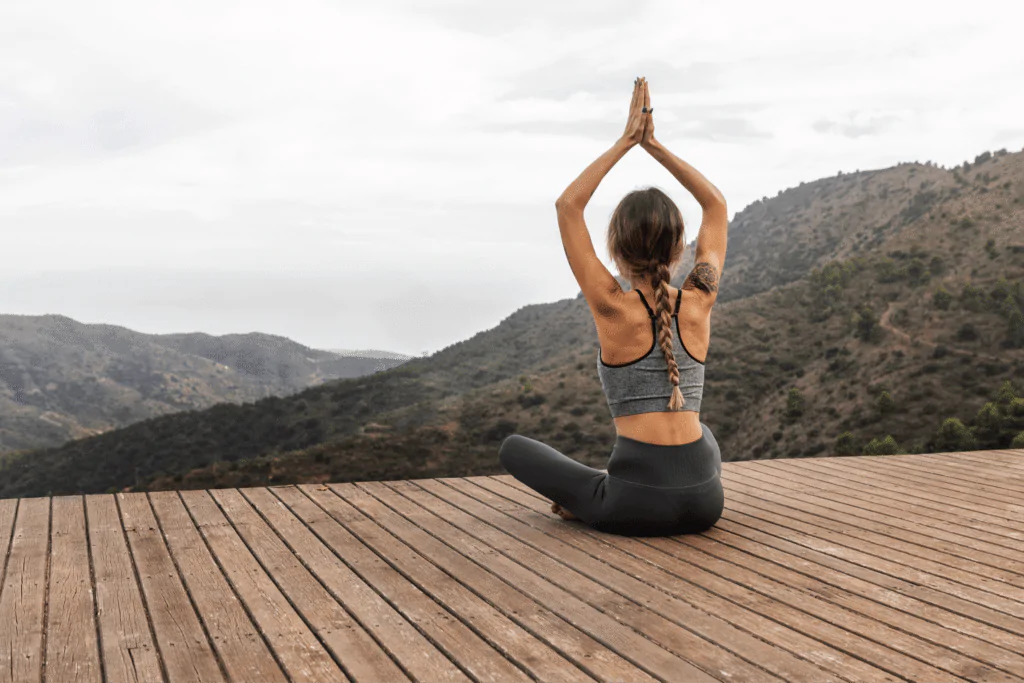
Choosing the Right Meditation Pose
The truth is, there is no single best meditation position for everyone. The right pose for meditation depends on your body type, flexibility, comfort level, and the length of your practice.
If you are just starting out, choose a position that feels natural and doesn’t distract you with discomfort — like Sukhasana, Chair Meditation, or The Burmese Position. These beginner-friendly poses allow you to focus more on your breathing and mindfulness rather than your posture.
If you want to deepen your practice and improve body alignment, try poses that engage the spine and hips more — like Half Lotus, Vajrasana, or Siddhasana. These positions provide stability while allowing energy to flow through the body.
For those with more experience and flexibility, advanced poses like Full Lotus or Padmasana offer unmatched stillness for longer sessions. But remember — forcing yourself into an advanced pose too early can lead to injury, so progress gradually.
Also, don’t underestimate active meditation positions like Standing Meditation or Walking Meditation. These are perfect when your mind feels restless or when you want to combine mindfulness with gentle movement.
The key is to listen to your body. Your meditation posture should help you feel both relaxed and alert — not tense or sleepy.
Conclusion
Meditation is not just about closing your eyes and sitting still — it’s about creating a space where your body and mind work together in harmony. The beauty of exploring different meditation poses is that you can adapt them to your daily needs, energy levels, and surroundings.
Some days, the best meditation position might be lying in Corpse Pose after a long day, while on other days, it might be a more active Standing Meditation to boost focus. The important thing is to stay consistent and choose the guided meditation position that keeps you comfortable and engaged.
Experiment with these 15 poses, notice how your body responds, and slowly build your personal meditation toolkit. Over time, you’ll find that your chosen meditation position becomes more than just a posture — it becomes a signal to your mind that it’s time to slow down, breathe, and connect with yourself.